
How I Make YouTube Videos
I’ve had a few people ask how I make YouTube videos so in this blog I will share with you the entire process in the hopes of helping some of you.
Let me start by saying that I am no filmmaker nor a professional videographer. To me video is nothing more than a marketing tool to get my photography out there. Although I enjoy making the cinematic travel videos, you can tell they have an amateur quality to them. In part that’s what I like but mostly it’s because I just don’t have enough interest in video to take my skills to the next level. If making a living from YouTube wasn’t necessary, then I would just photograph and write blogs. With this disclaimer out of the way, let’s look at the gear.
Gear
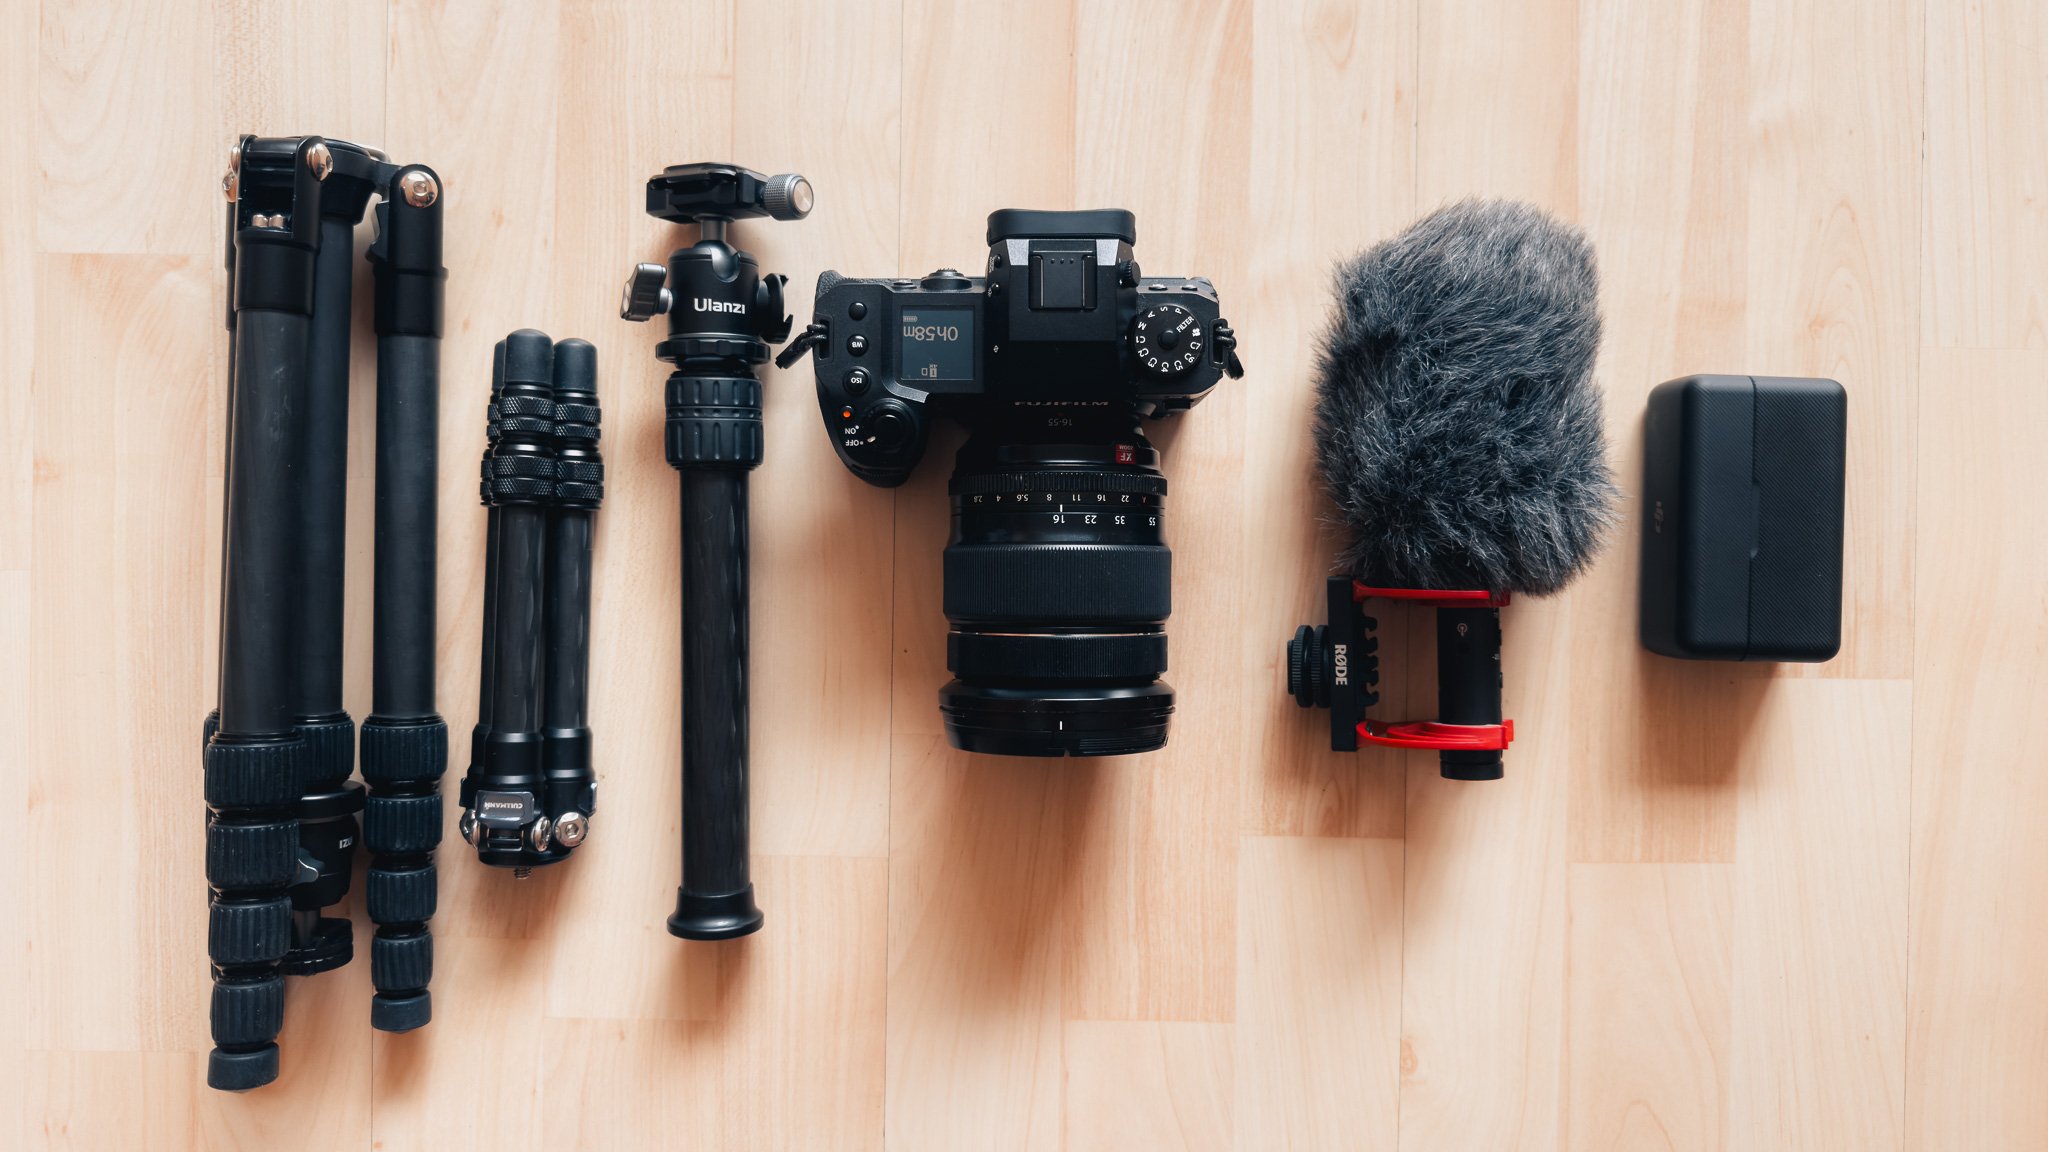
My main video camera is the Fujifilm XH2s. It undoubtedly makes the whole process easier and more enjoyable. It also has a really nice look to the footage which I personally love.

As for lenses, the 16-55 f2.8 is my go to lens for all video. This focal length covers almost everything one would need. However keep in mind that I do not vlog. If I was mostly vlogging then I would want something a little wider. The new Tamron 11-20 looks nice for that. With that said I use all my lenses for video even the primes.
I have a small Cullmann Carbon tripod for when I am travelling light and a slightly bigger Manfrotto Elements one for when I have a bigger focus on video, somewhere rural or will be spending a longer time in one spot. I don’t use any ND, mist or other filters. I also don’t use any lights. Although in the future I might experiment with filters more.

As for mics, I have the DJI Mic kit which is amazing for travel and recording audio off camera. I also have the Rode VideoMic NTG which is great although a little bulky.

Settings
I shoot everything in FLOG2 and usually overexpose the footage by +0.3. If I am filming static scenes, I just leave the camera in Aperture Priority at around f8 and let the shutter speed do whatever it needs to. If I am shooting motion, I will try to get the shutter speed down to as close as I can get to the double frame rate rule. If this is not possible due to ambient light, I will keep it within the same multiple as the frame rate. For example if I am shooting at 50fps then I will try to keep the shutter speed at 1/100, 1/250, 1/500 and so on. Of course it is not the most natural motion blur but I am ok with that.
Speaking of frame rates, I shoot all my talking head or static shots in 25fps and all my B Roll in 50fps. This allows for slowing down later if I need to. The UK and most other countries I visit run at 50hz so although I would much rather use 30/60 fps, the flickering can get annoying.
In general I shoot everything in 4K ProRes 422. For YouTube, you can easily get away with 1080p and upscale it on export. However the reason I shoot in 4K is to allow me to crop in if I need to in editing. Speaking of editing, shooting in ProRes makes editing a breeze. ProRes is an Apple codec and M1 / M2 chips in Macs and iPads are optimised for it. This means that it is a fraction as intensive on the computer as H.265. The price you pay is huge file sizes.
Step 1 - Ideas
I keep a notes folder with all video ideas. Whenever I have an idea, I will create a new note and write it down. No matter how silly. Every week I go through the list and either add or remove ideas. I also select 4 videos I want to focus on for that month and move the to a different “in progress” folder.
Step 2 - Script
All my videos are scripted. This serves two purposes. Firstly it creates a blog and secondly it allows me to be concise and precise with the information I share. I am not a vlogger and often can’t think clearly when on camera. By having a script to follow, even loosely, I make the whole filming process more efficient and deliver a more concise product. Once the video is filmed, I tidy up the script and publish it as a blog.
Step 3 - Film
My videos always follow the same structure. A talking head portion with B Roll on top to illustrate what I am talking about. Unless it’s a cinematic / POV which is different. Once the talking bit is filmed, I cut it up into a rough edit and then make a list of what B Roll I need.
I then head out and get all the B Roll I need. Sometimes this is done in reverse. Most of the filming is done by myself however sometimes my friends or family help out if we are travelling together.
Step 4 - Edit & Publish
I do all my editing in Final Cut Pro. I have a template library with events and video elements already so I just duplicate it.


I use the official Fujifilm FLOG2 LUT to give me a starting point and then grade from there using the built in tools. I do not use any plug ins.


Once edited, I will save any B Roll I want to keep to a separate library and export 2 copies. The first is optimised for YouTube. The second is a full size ProRes file for external backup. I will then delete the library.
Finally I will have a separate library for B Roll. This is more specific to each location I visit. So for example Paris has its own library with events inside for each area or event. This is also stored externally once the trip and all related videos are done.


That is all. My main goal is to keep the video making process as streamlined and efficient as possible. I know this will be different to everyone however I hope this blog has answered some questions.