Correct Settings For The Best iPhone Photos
I own a bunch of fancy camera gear however my favourite camera is my iPhone. The phone is always on me, it’s minimal, unobtrusive and is the perfect daily compact camera. In this blog I will show you step by step how you can get amazing photos using your iPhone.
Everything I share will be on an iPhone 14 Pro but almost everything will carry over to any other iPhone. Finally the phone is running iOS17 so make sure to have updated your software to get the most out of this blog.
As for apps, I have tried them all and I only use two. For the camera, nothing beats the default camera app. As for editing, Lightroom is the winner.
Camera Settings
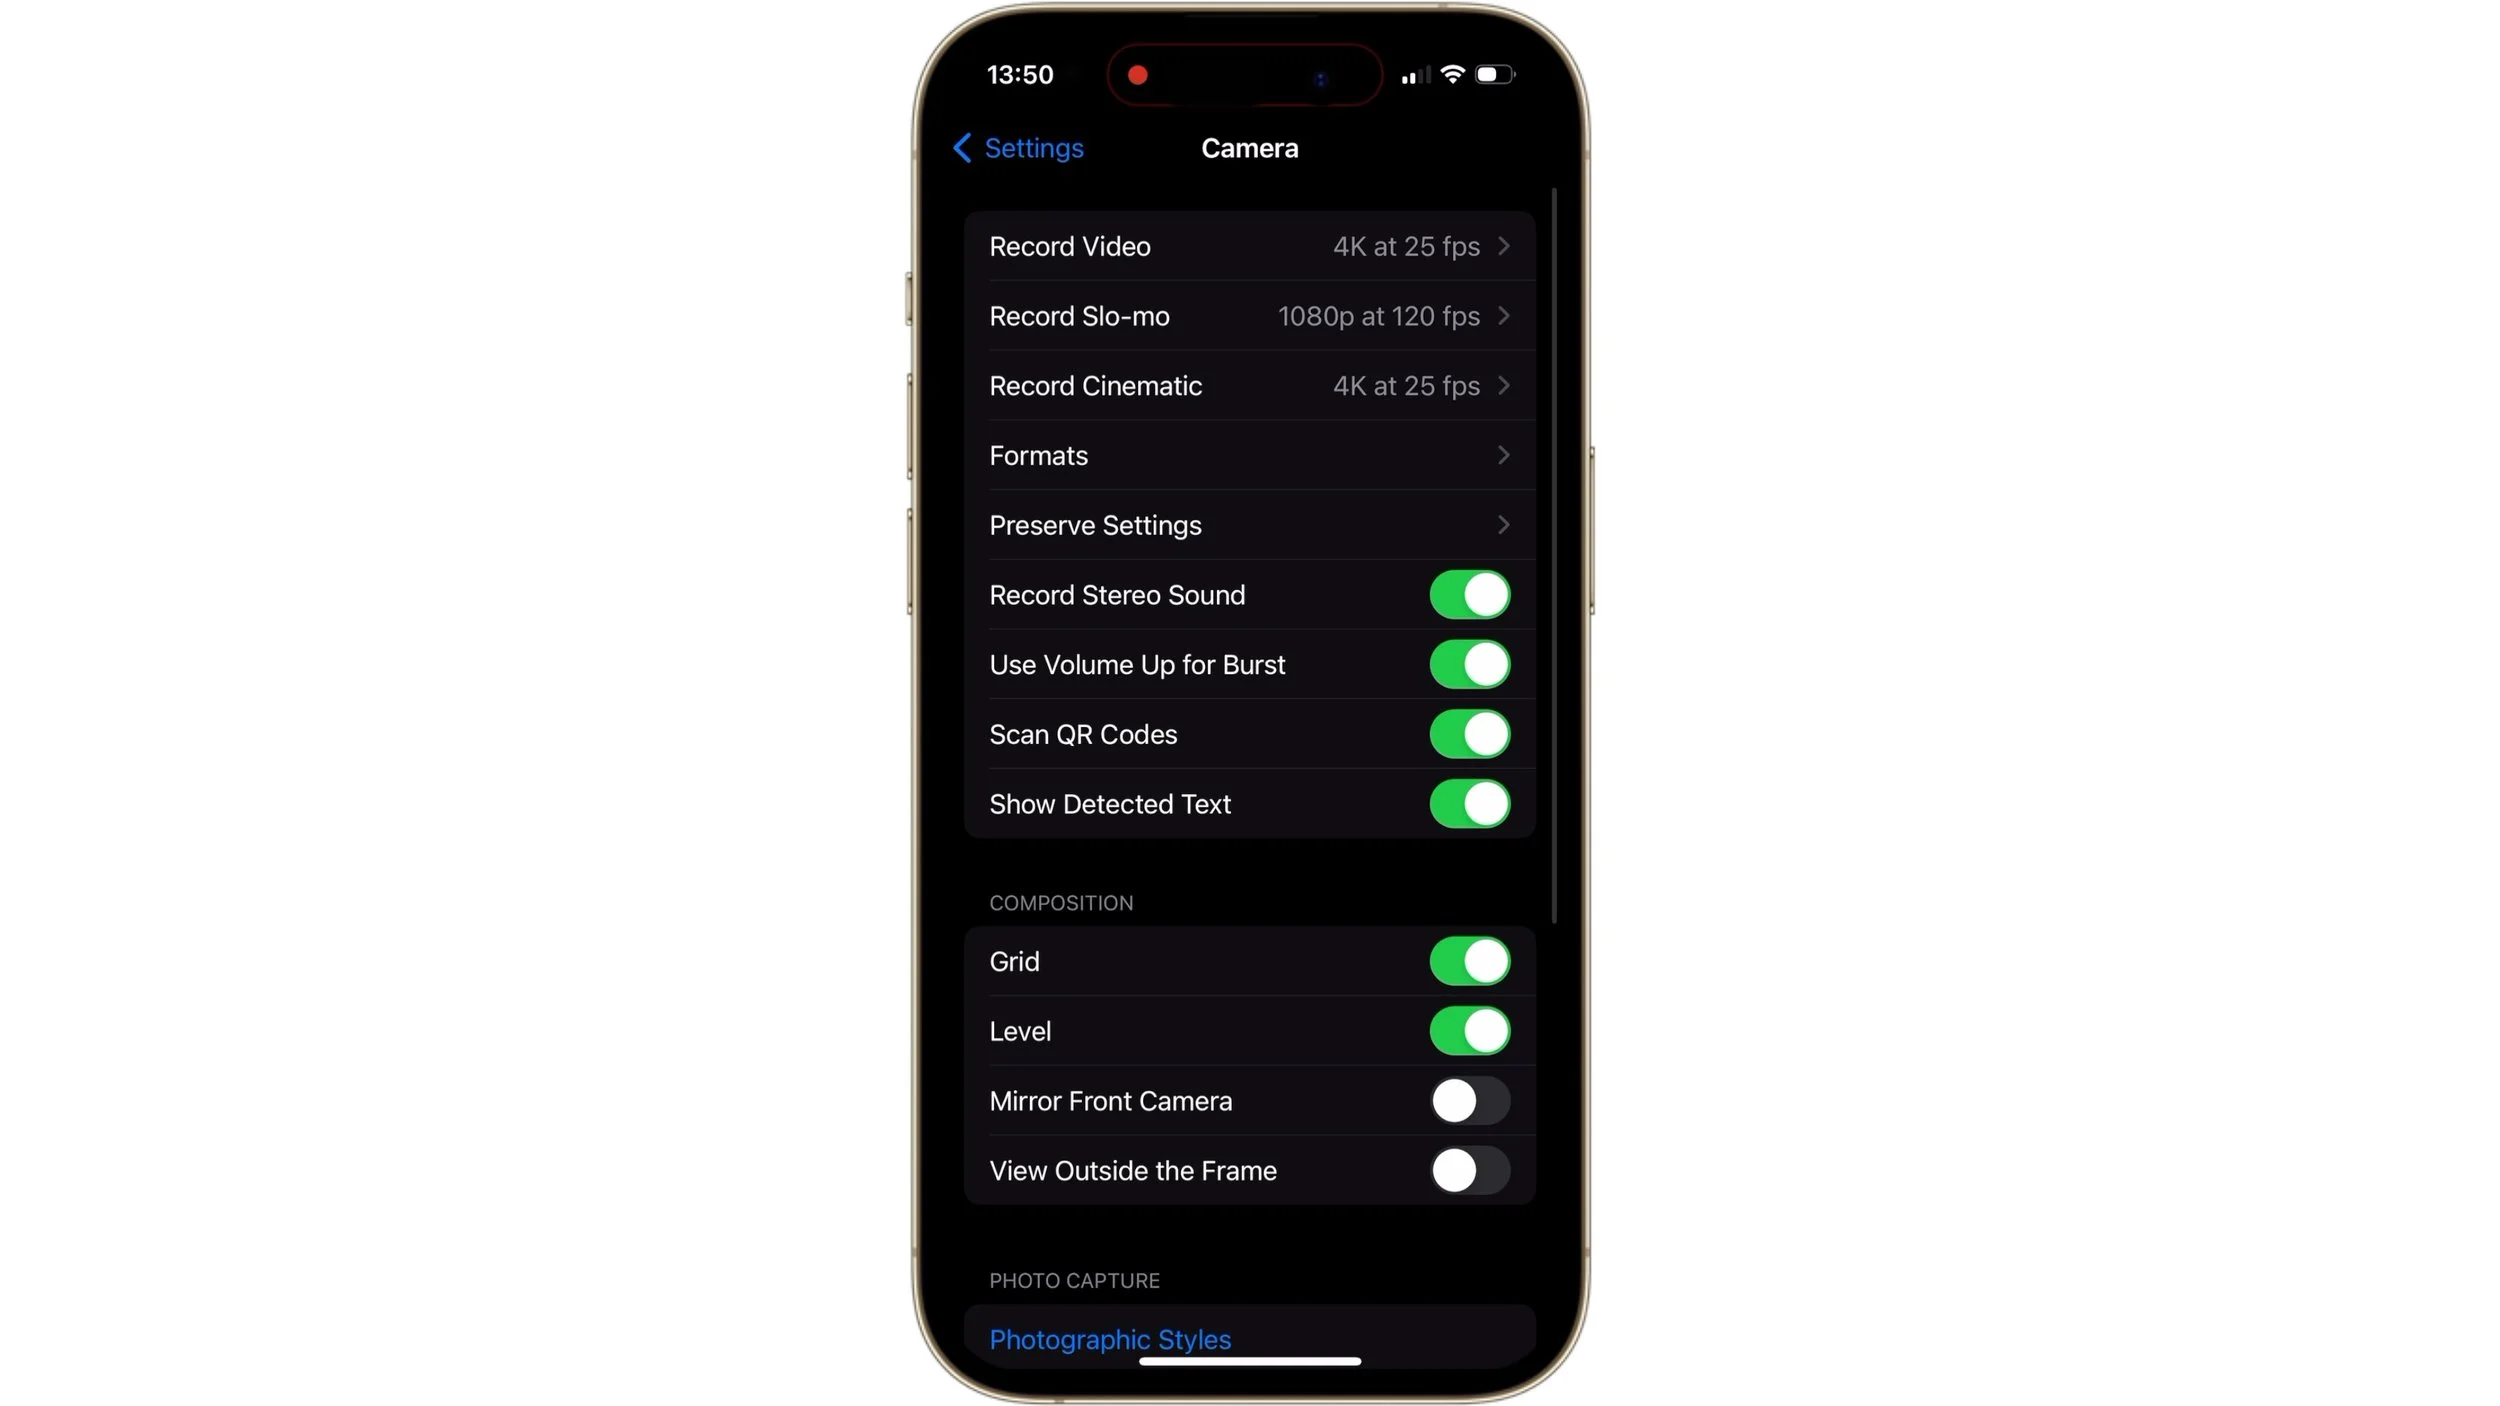
First let’s make some changes in camera settings. Go to the settings menu then into the camera section. We will start from the top and only focus on photography related settings for this blog.
In the formats section leave camera capture as high efficiency although this doesn’t really matter as we are shooting in RAW. Next turn Apple ProRAW on as this will give us the best image quality and the most flexible file.
Under Pro Default select ProRAW MAX (Up to 48MP). This is the highest resolution possible when using the main wide lens.
Next go to preserve settings where you can enable the camera to save specific settings and turn on the following:
Camera Mode
Macro Control
Exposure Adjustment
ProRAW * Resolution Control
Live Photo
Everything else leave off.
Switch on volume up for burst. This will make it easier to take a burst. Then in the composition section turn the grid and level on. Turn view outside the frame off. These features will greatly help with composition.
Photographic styles won’t apply to RAW files to leave them alone.
Prioritise faster shooting is off. Lens correction is on. Macro control is also on.
Lens Choice
When you open the camera app you have 4 lens choices. If you’re on the iPhone 15 you have even more… however they are not all real lenses. 0.5x is ultra wide. It can be great for architecture, landscape or getting unique angles and perspectives. This is also the lens that would be used for macro if you wish.
Next is 1x which is the wide and the main lens. This has the best image quality, the best glass and the full 48mp resolution. It’s equivalent to about a 24mm lens on a full frame camera and is the lens I use 50% of the time. Great for establishing shots, environmental portraits and getting nice & natural background blur.
Next there is the 2x lens which isn’t really a lens but a crop into the 1x lens. I don’t really use it as I’d rather crop myself later if I need to however it is good for composing with a 50mm preview. Keep in mind if you do shoot in the 2x lens mode, you can’t undo the crop. So if you decide later it’s too tight, you’re screwed.
Finally we have the 3x lens that equates to about 77mm. Although the quality is lower, it is good enough and you can get some great images. I use this lens for subjects, details or when I want that telephoto compressed look.
Exposure & Focus
When you are shooting high contrast scenes, you can expose for the highlights by simply tapping on where you want the camera to focus and then dragging your finger up or down.
This will reset as soon as you move the camera however if you press and hold the area where you want to focus, the camera will lock both focus and exposure so it will not reset until you exit the app.
If you want to lock the exposure only, simply tap on the exposure meter at the top left of the screen and set the desired level.
That’s all for this blog. I hope you have found it helpful. Now just grab your phone and head out to shoot!
If you’re considering purchasing this item and use the affiliate links below, it will not cost you any extra however I will get a small % kickback which helps keep this blog ad free for you to enjoy.
Purchase here:


