DJI Osmo Action 5 Pro Settings (Vlogging & Photography POV)
In this blog, I will share the video settings I use on the DJI Osmo Action 5 Pro for vlogging and general POV travel and photography videos. These settings are specifically for the mentioned use cases, so if you plan on shooting underwater or capturing action sports, these might not be the most optimum settings.

Resolution, Frame Rate, FOV, & Stabilisation
The first set of settings can be accessed by swiping up from the bottom.
Resolution - I use 4K by default as I want the best image quality.
Aspect Ratio - I use 16:9 if I am filming for YouTube and then simply turn the camera into vertical orientation if I am filming for social media. If I am not sure where I will use the clip, or need to use it for both horizontal and vertical, I will film in 4:3.
Frame Rate - I use 25fps for most of my footage but sometimes will go to 50fps if I want that look. I change to 24 / 30 / 60fps if I am filming in America, Japan, or any 60hz country. This avoids flickering issues.
FOV - I set this to Standard (Dewarp) because I don’t want that fish-eye action cam look for most of my vlog-style footage.
Stabilisation - I set this to Horizon Balancing for most of my standard vlog-type stuff. I will change it to Rock Steady for scenarios where I want a wider FOV, a more natural feel, or if I know the camera will be thrown around a lot.
Video Mode - I leave this as default for my needs.


Pro Video Settings
To access this, press the little settings icon located on the right middle edge of the screen.
Exposure - I set this to auto with a (-0.3) compensation. I find this camera to run brighter thus risking overexposing many scenes. This brings it back to a more neutral exposure. ISO I set to 100-12800.
White Balance - I leave this on auto for most scenarios; however, if I am filming during sunset / sunrise or anywhere with strong temperature shifts, I will lock it in manual to avoid white balance shifting during recording. Exact Kelvin depends on the scene but around 4700 is a good starting point.
Colour - Colour recovery is off because I want the most flat profile possible for grading. Colour is set to D-Log M 10Bit to give me the most gradable file possible.
Adjustment - Here I set both texture and noise reduction to (-2). These adjustments are best saved for editing, and I want the most “raw” footage out of the camera.


Pro Audio Settings
While in this section, let’s quickly look at the few audio settings we have here.
Channel - Stereo
Wind Noise Reduction - Standard

For the next set of settings, swipe down from the top.
Quick Switch Button Settings
To access this, press the QS button. This feature allows you to customise what the side QS (power) button does when the camera is on. This is a very personal setting, and what you select will depend on what modes you value most. I will share my setup, and you can then adjust as needed. The only thing I would say is keep this as minimal as possible; you don’t want every feature here as that defeats the purpose of the quick switch.
Feature - This is set to Switch Between Modes
Shooting Mode - Screen Switch, Photo & Video

Moving to the other settings in the swipe down menu
Lock Horizon - I leave it on because I seldom switch between horizontal and portrait, so I’d rather have it locked.
Full Front Screen Off - This means the front screen will show you the full 16:9 picture and not crop it to fit in. This helps with ensuring the composition is okay.

General Settings
Now let’s delve into a few settings in the general menu (top right icon).
Snapshot - I have this set to video as 99% of my use case for this camera is video.
Single Screen Preview - On
Always On Display - Off
Screen Off When Recording - 5 Min
Built-In Mic Audio Backup - I have this on. Even if you use an external mic, this will record a separate audio track using the internal mic as backup.
Bitrate - High
Sounds - Mute

Photo Settings
Even though this is primarily a video camera, there are a few photo settings I change.
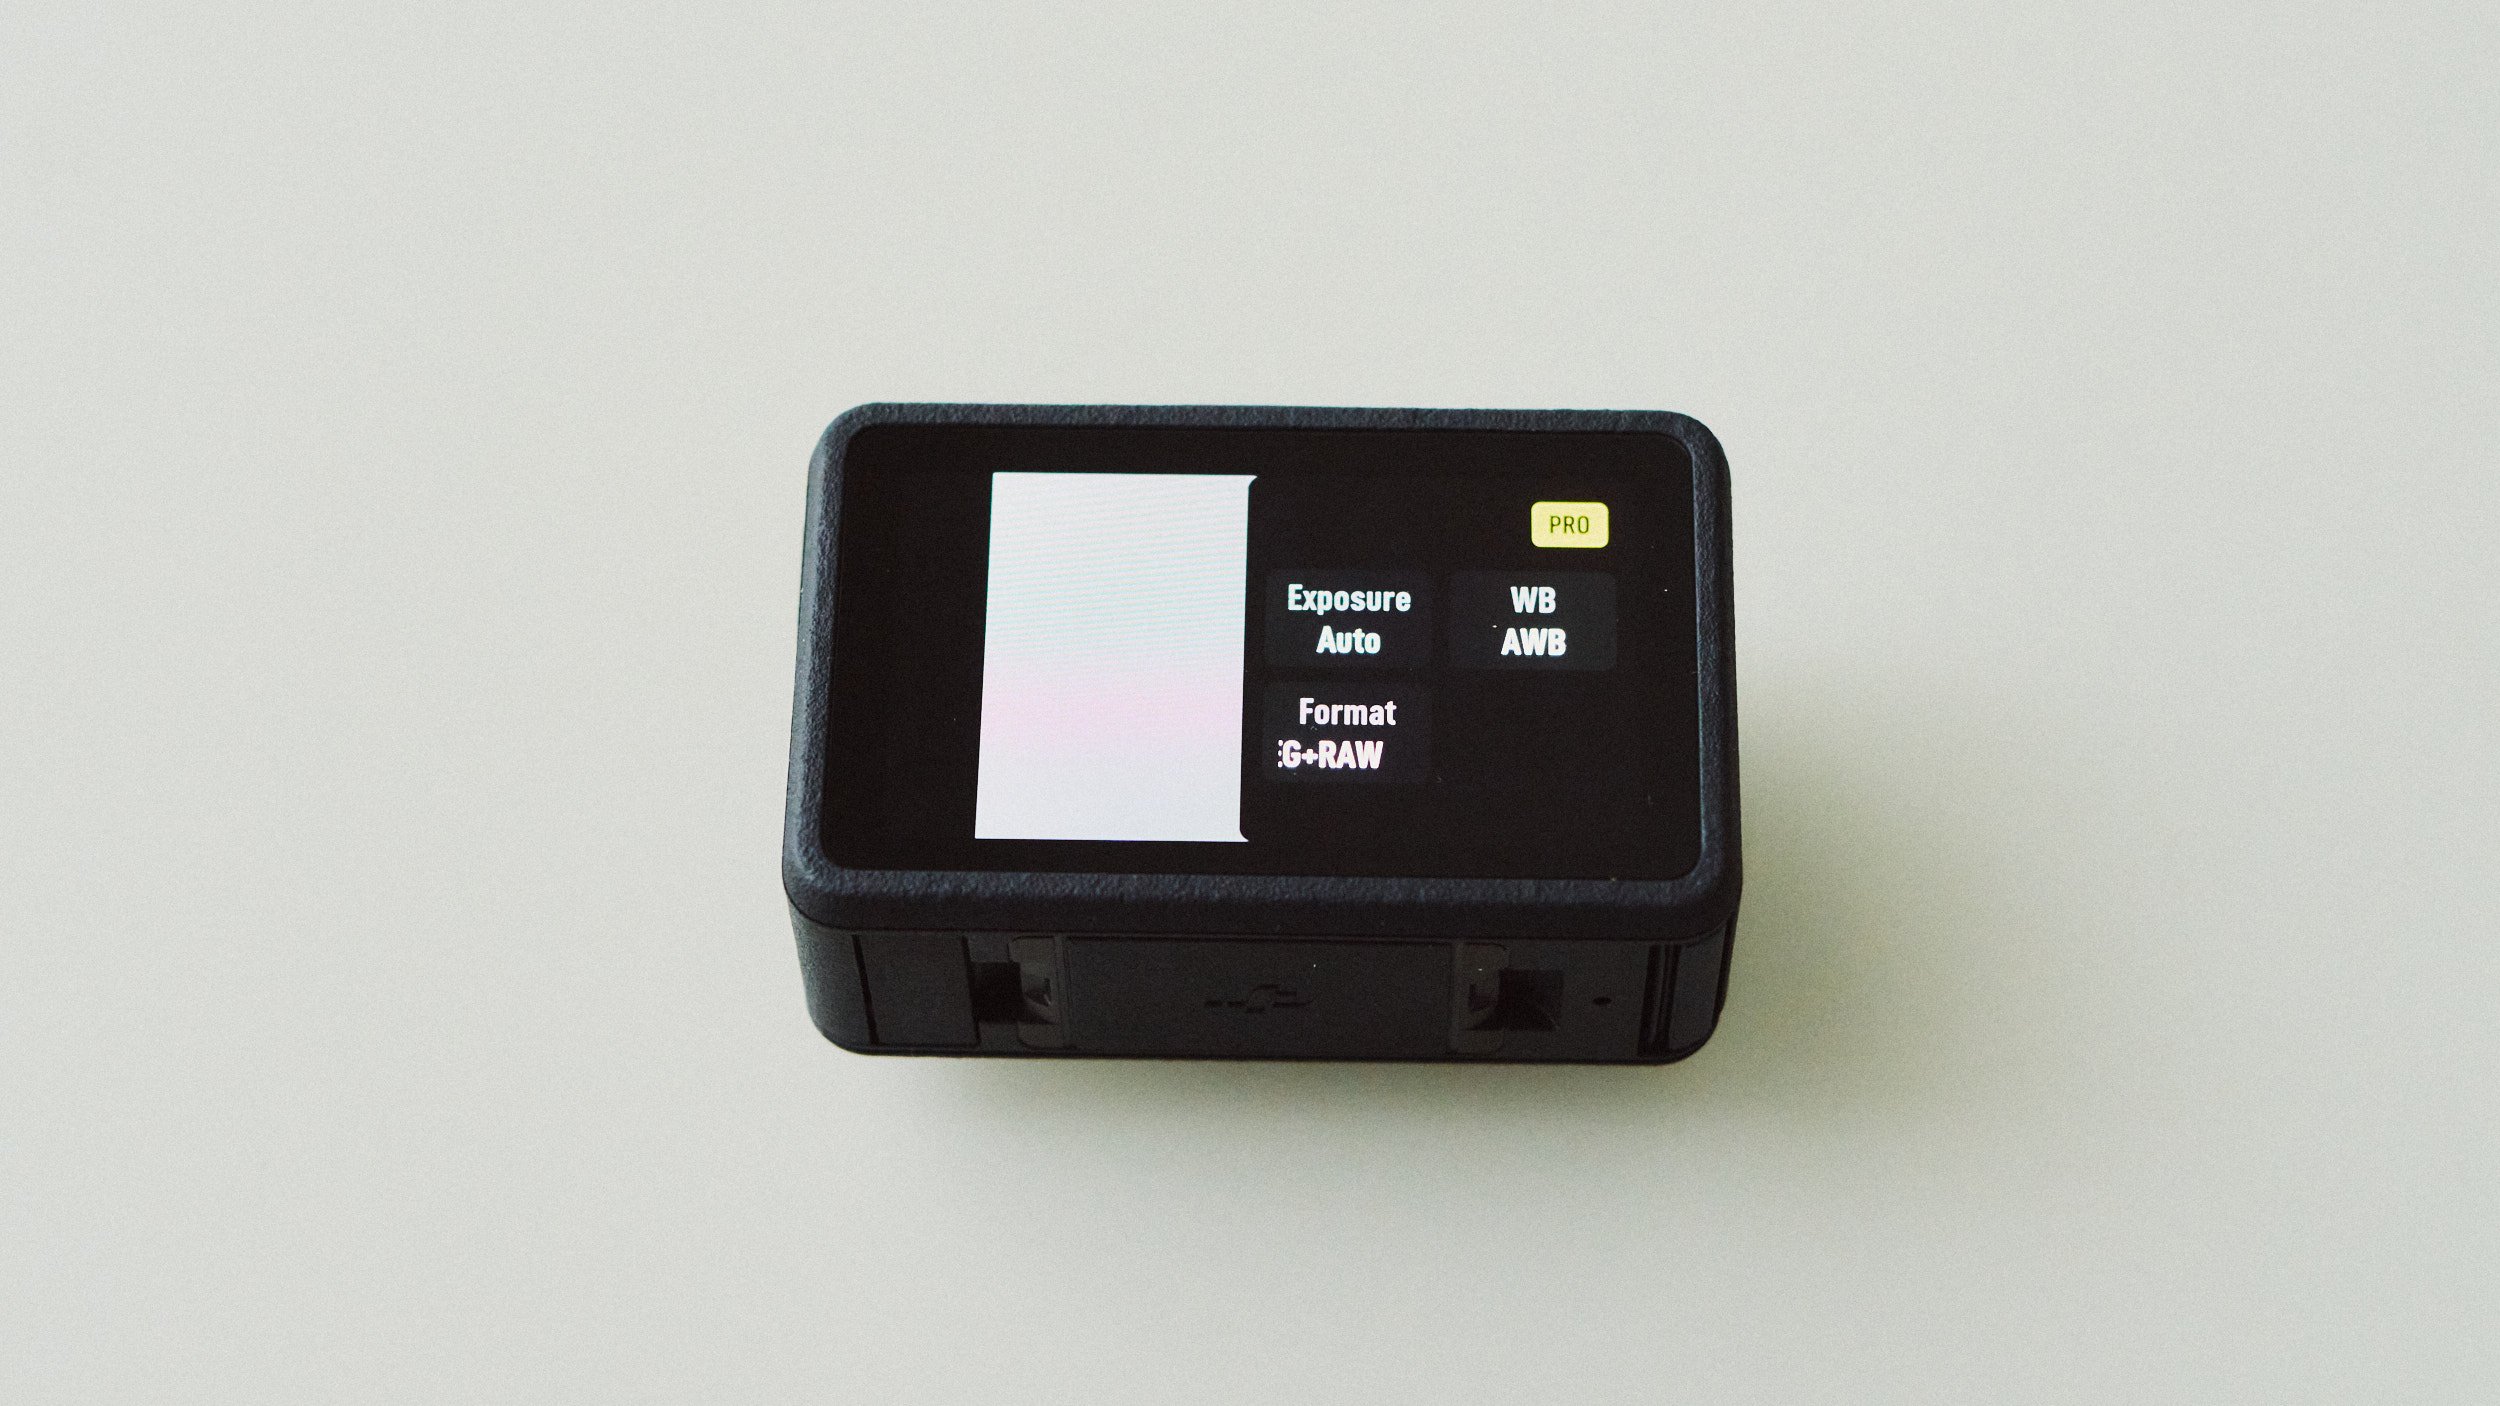
Exposure - I set this to auto with a (-0.3) compensation. I find this camera to run brighter thus risking overexposing many scenes. This brings it back to a more neutral exposure. ISO I set to 100-12800.
White Balance - I leave this on auto as even if some adjustment is needed, that’s easy to do with a RAW file. The only time I will lock it in manual is if I am doing a Timelapse or a series of photos. Then WB and even exposure will be manually locked.
Format - JPEG + RAW always. I always delete the JPEG and just work with the RAW.
Aspect Ratio - L(4:3)
Focal Length - Standard (Dewarp)